
🛠️How I vibe-coded my 90s-game themed portfolio using ChatGPT + Google AI Studio

Why vibe-code a portfolio?
For the longest time, my newsletter quietly doubled as my “portfolio.” All my case studies live here, my writing lives here, and it felt good enough. I never felt a strong need to build a glossy, dedicated portfolio website.
But looking at some portfolios designers have carved for themselves, I can’t help but think of it as being more than just displaying work. It’s a chance to express personality. It’s a small playground where you can show the kind of creative chops you don’t always get to use in product work.
So with the AI tools now available and the experience of having done AI assisted prototypes at work, why not try “vibe-coding” my own portfolio and see where it goes?
Except, I figured, this was going to be a very different kind of challenge. Up to now, all my AI experiments have lived in the “vibe-design” bucket - fully working mid to “highish” fidelity prototypes that help teams understand flows, UX decisions, and behaviour. Those are functional tools inside my design workflow.
A portfolio, on the other hand, needs something else entirely.
It has to be expressive.
It has to be high fidelity.
It needs to feel crafted.
Micro-interactions have to be intentional.
And it has to exist as a real, deployable website, not just a prototype running in a sandbox.
🎥Playing around with my portfolio website
Don’t start directly in the AI tool (v0/Bolt/Lovable)
A lot of AI design tutorials begin the same way → “I want to build X. Let’s open v0/Bolt/Lovable and just prompt it.”
You describe the website or app, hit enter, and the tool spits out layouts. And you continue to iterate from there. It’s fast and it gives you something to react to, but it’s shallow. That approach works for quick UI explorations, but to build anything real with structure, you require a system.
A system helps you have a structured, repeatable method of generating artifacts without compromising thinking or quality.
Over the past year, I’ve built a lot of AI-assisted prototypes, some of them complex, with multi-role flows, behavioural logic, and sometimes high-fidelity UI. And here’s the catch - these prototypes survived because I established context first and only then executed inside the AI tool. They usually break badly when you don’t.
Tools like ChatGPT or Claude are phenomenal for this. They can hold a deep, multi-layered context and effectively act as a UX co-pilot. This becomes invaluable when you step into execution tools (v0/Lovable), because you’re no longer prompting from scratch.
I wrote about this in depth here: Context > Prompt: A designer’s system for an AI copilot.
Tools like v0, Lovable and Google AI Studio are incredible at what they do and they even allow instruction sets, which help a bit.
You can add additional context inside these tools through things like a roadmap.md or a /guidelines folder in your project (and I’ll get to that soon).
But the heavy lifting, the reasoning, the design direction, the architectural thinking is something I’ve learned to do outside the execution tool, before the code begins.
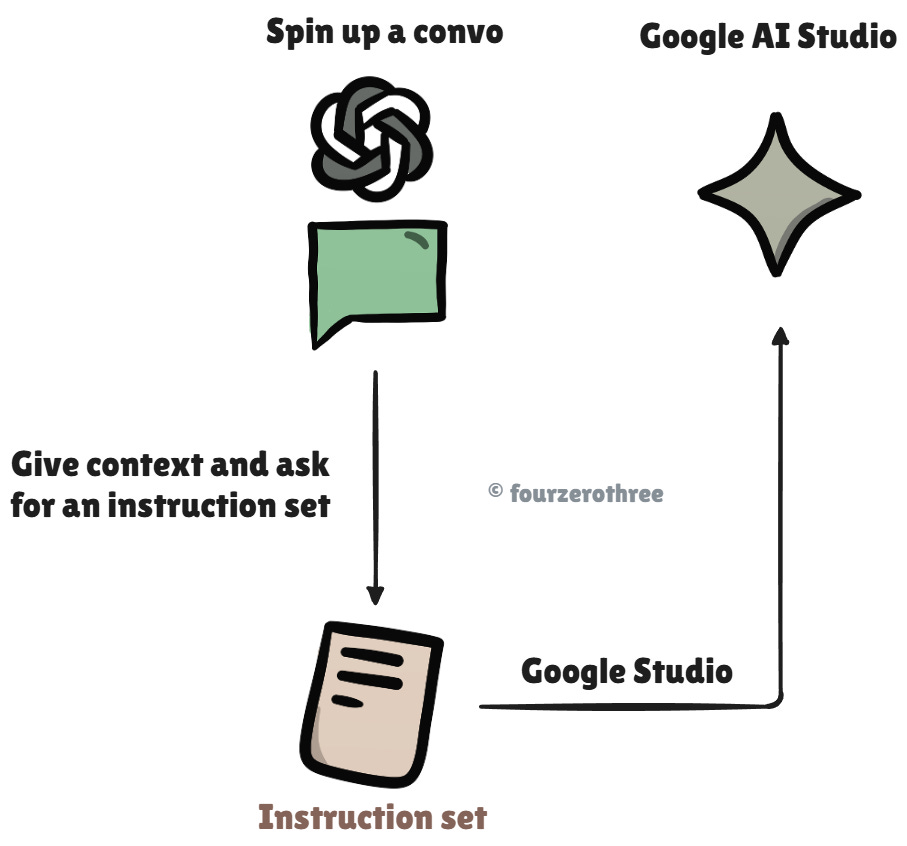
And that is the core principle behind something I call “The Two-Tool Workflow”.
(Side note: Tools like Cursor or Google Antigravity have powerful features like “Plan” mode, which can hold even richer context.)
📖 Read next:
- Context > Prompt: A designer’s system for an AI copilot
- Riffing With AI: My ChatGPT → v0 → Figma Workflow
The Two-Tool Workflow that powered this build
The two-tool workflow on a high level is simple.
Design, reasoning and prompt authoring happen in ChatGPT. It’s my UX co-pilot.
Execution and refactoring happen in the AI prototyping tool (Google AI Studio in this case).
This workflow is powerful, especially when building complex apps with numerous flows. This approach has worked consistently for me at work. For a portfolio website however, the approach is the same although a lot simpler (there are lesser UX artifacts).
ChatGPT
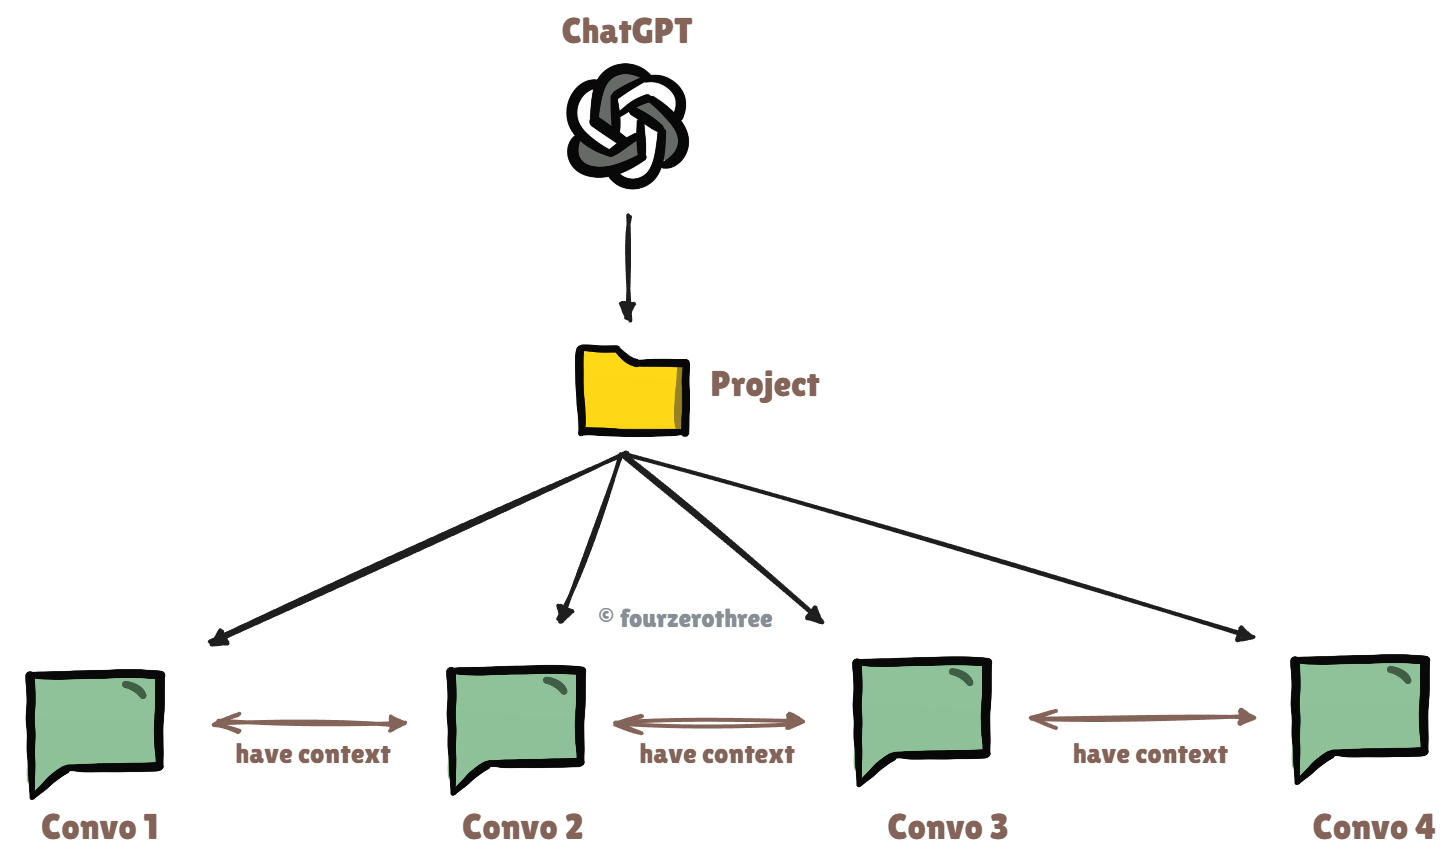
Never have isolated conversations. If you do, you’ll constantly need to re-feed context This can become cumbersome.
ChatGPT “Projects” solve this.
Think of them as folders that remember everything:
instructions
files
your design philosophy
and every conversation inside the project
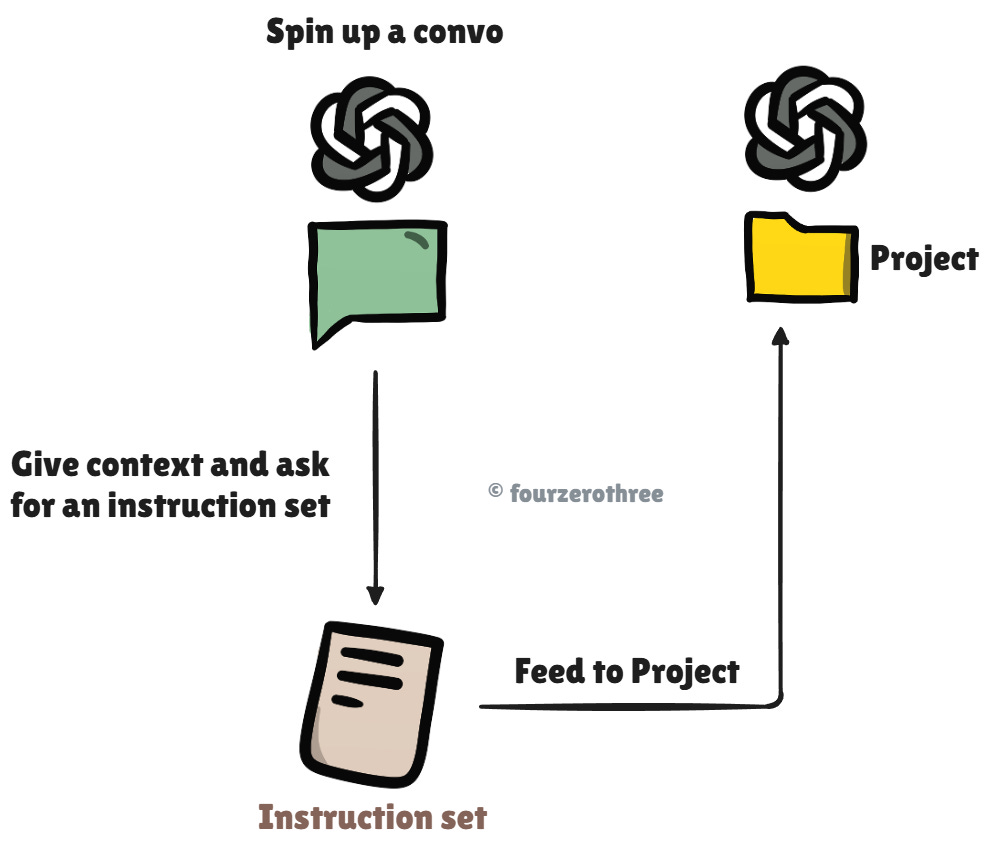
I created a Project called “Portfolio website”. Ideally I also want to feed an instruction set, so there is some type of direction for ChatGPT to follow.
To do this, I started a conversation and gave detailed context as to what my goal was and how I want the instruction set to be (additionally I attached my CV as well).
Prompt:
I want to create a fancy design portfolio with the help of AI tools and get it deployed/published. I already have a portfolio at www.fourzerothree.in. Right now fourzerothree is a newsletter side project where I have a section for my case studies.
It works very well, but I want to get creative with this portfolio of mine. I am thinking of 3 tools to create this with:
- Google AI studio
- v0 by Vercel
- Figma Make
I actually want to get very creative. I want it to be like a 90s pixelated computer game - think “Dangerous Dave”, “Prince of Persia”, Wolfenstein 3D”. You would have to help me build it.
I am going to start a Project for this here. But first I need a solid (super solid) instruction set so that you know what to do and how to go about doing stuff. The instruction set should be comprehensive.
Remember I am a designer and the instruction set for you should include
- The AI’s role
- The expected tone
- Your design principles
- non-negotiables
- How to handle ambiguity
- How to retain context
And add some more if you deem it fit.
The prompt is detailed, and I talk to ChatGPT as if I am telling a friend of mine what I want to do and “how I want his help”.
I get the instruction set → read it → iterate → and finalise it. I then feed this instruction set to my Project.
Conversations
All my conversations relating to my portfolio lived within this Project.
Creating a plan
Ideally I would want to create a roadmap for the product.
For web apps one would ideally start with research → and then move on to UX artifacts → UI layout → build prototype. I could go on, but this is for another article.
For “websites”, it’s simpler and a bit different.
a) Foundation
I would want to define it’s foundation - stuff like business goals, target audience, value proposition, tone/voice and all that jazz. This was straight forward. This was my portfolio and I wanted it to be creative, playful and themed like a 90s PC game.
b) Structure
Based on all of this, I would want to create the structure (website pages and sitemap for the website). I knew what pages I wanted. This was a no brainer.
c) Content
Next, I would want to create the content for each page. This I had to brainstorm with ChatGPT.
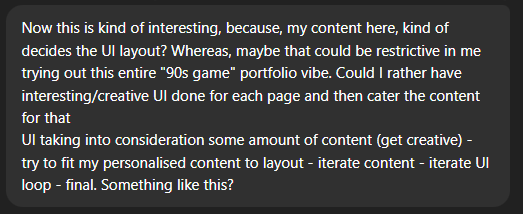
d) Layout
The content decides the UI layout (brainstorm with ChatGPT).
Point (d) is important. Content decides the UI layout!
I could directly jump to deciding the content and planning the layout for the pages.

Creative UI direction
Before I jump to creating the content and UI layout for the pages, I need to establish some sort of “UI direction” I want to head in.
You could say this is something akin to wireframing but done in high fidelity with the styling, branding and the creative direction. This was primarily because I wanted it to be themed like a 90s PC game and I was starting on a blank canvas.
Added some inspiration snapshots.
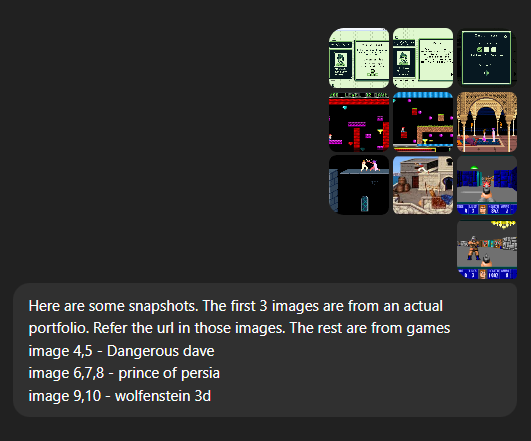
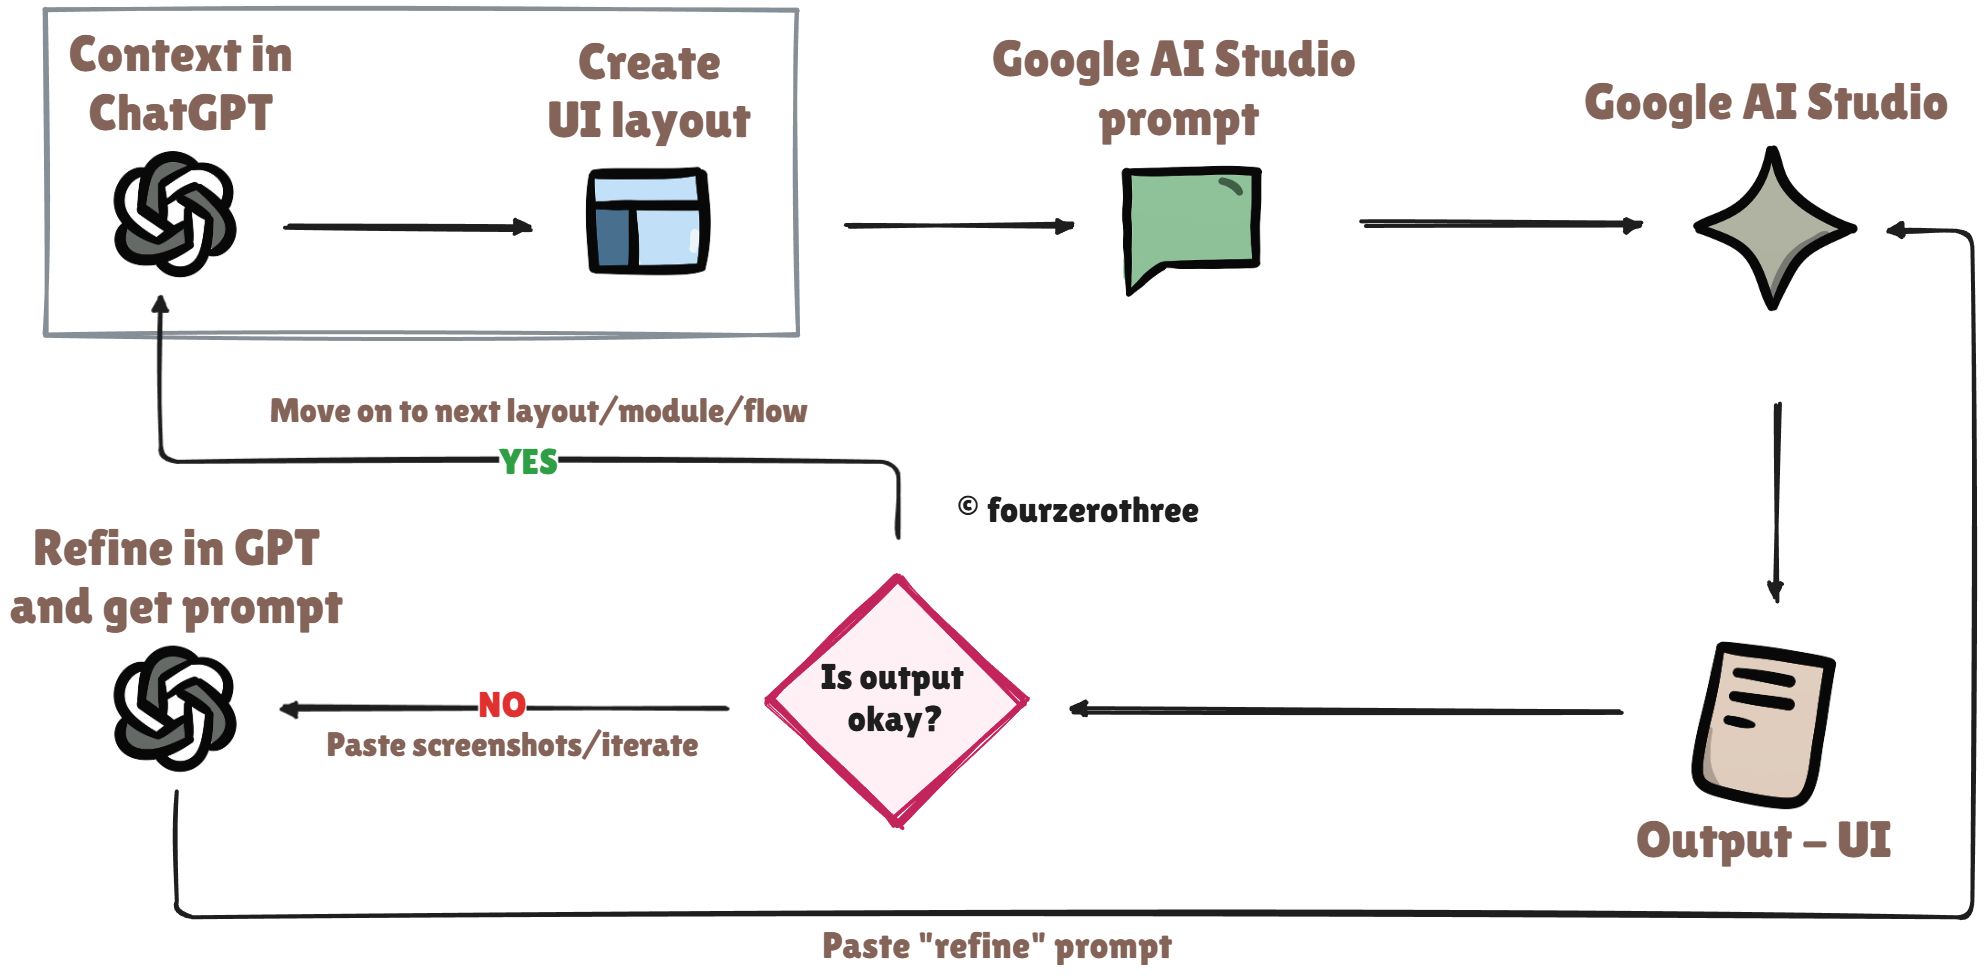
At this point I was still exploring possible shells and layouts. That’s where this iteration loop kicked in.
Generate layouts in ChatGPT
Pick the most promising one
Convert it into a Google AI Studio prompt
Generate UI in AI Studio
Review output
If broken → send screenshots back to ChatGPT
ChatGPT refines the prompt
Repeat
This loop continued until I found a direction I genuinely liked.
This is an example of my prompt in GPT where I picked a promising layout and asked GPT to author a prompt to build it.
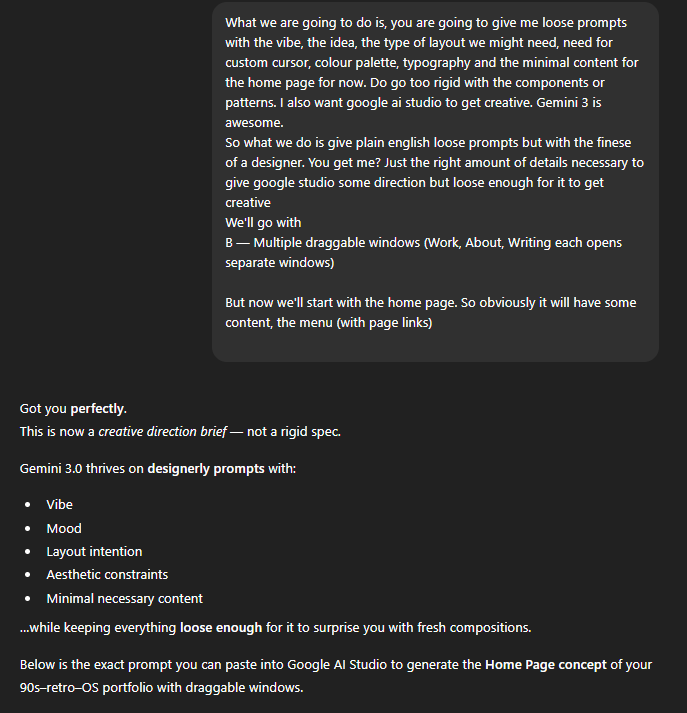
Why generate prompts in ChatGPT?
ChatGPT generates prompts that humans simply cannot.
My prompts could be short, incomplete, non-specific and lacking in structure.ChatGPT can enforce design-system discipline.
All rules stay intact → Typographic scale, colours, shadows, components, shell layouts.
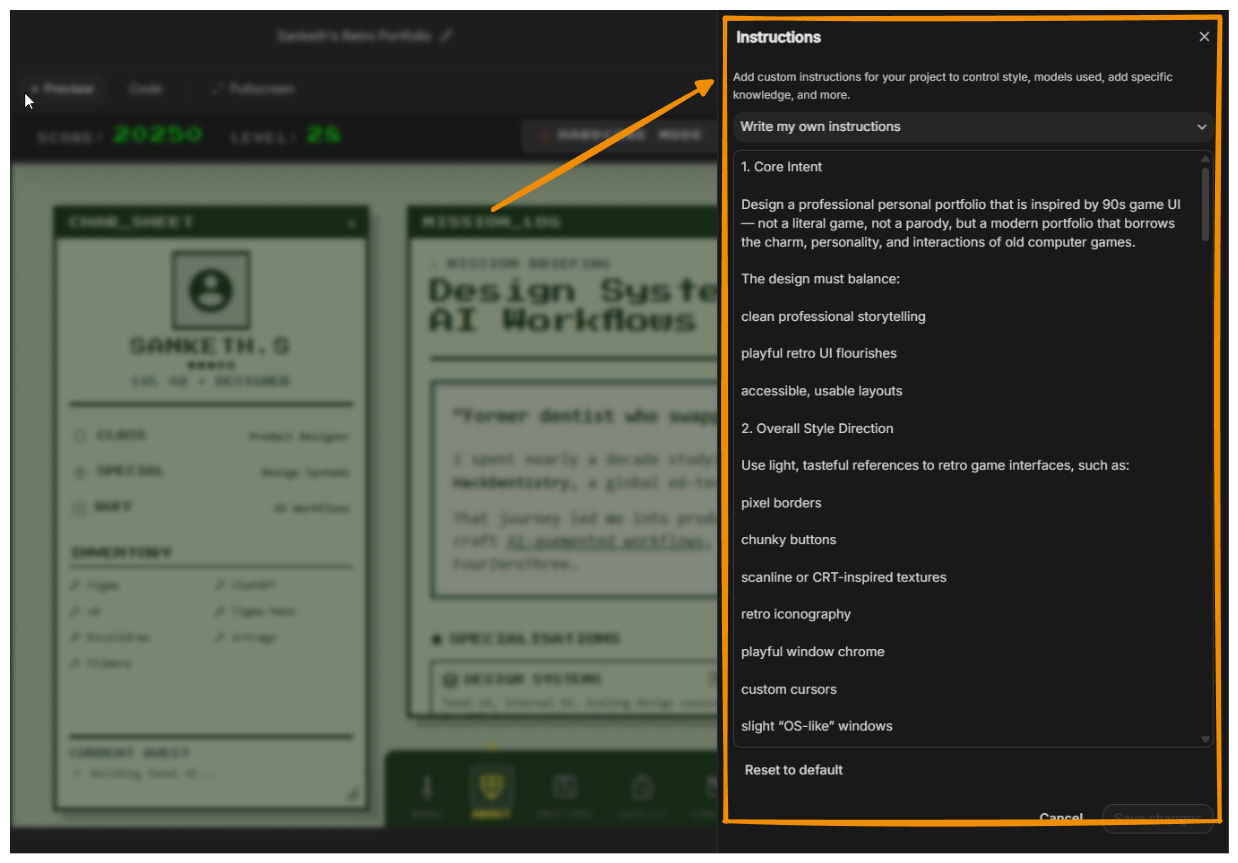
Google AI Studio
Instructions
Once I got a direction and narrowed down on a shell for the entire website, it was time for me to take things to the next stage.
I treated Google AI Studio the same way I treated ChatGPT. A teammate that needed orientation.
I made ChatGPT write a full instruction set that covered:
core intent
overall style and aesthetic direction
interaction philosophy
responsive (mobile and tab breakpoints) and accessible behaviour
creativity guidelines
tone and personality
what to avoid
content type to expect
summary
so I could feed this in Google AI Studio.
💡Pro tip
When prompting ChatGPT for an instruction set, I kept my prompts intentionally loose, without being too specific. Since GPT is my design partner and with the several conversations I have already had, GPT is smart enough to give me a detailed instruction set that pretty much covers all that I/we discussed. The magic lies in being a “Human in the loop”:
read → add/remove/iterate → finalise on the instructions.
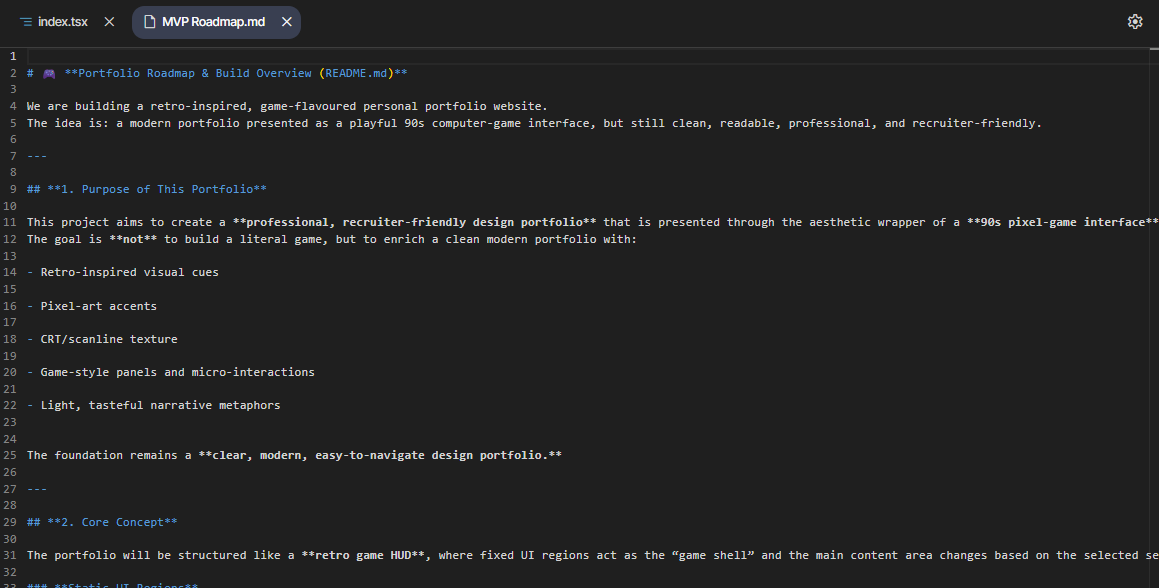
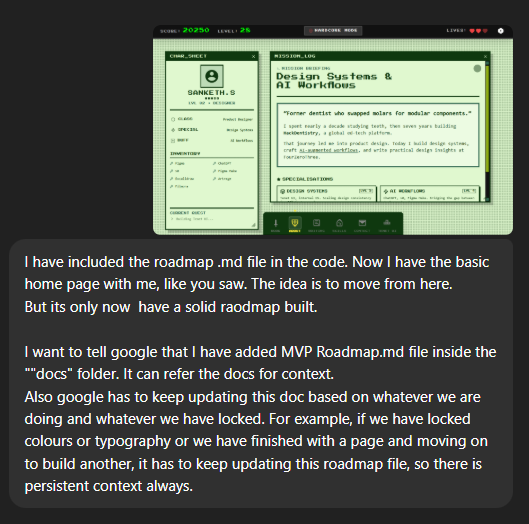
The Roadmap.md file - A persistent context layer
One of the most powerful things I did in this entire project was create a file called MVP Roadmap.md and drop it into a /docs folder.
This file became kind of the core memory of the whole build.
This document held:
the theme strategy
the IA structure
what was already built
what was locked
what still needed work
which decisions were temporary vs final
the aesthetic constraints
the scope of the MVP
what “done” actually meant
Let me reiterate, as to why authoring your prompts in GPT can be a game changer. Once I had the file in my folder, I asked GPT:
The prompt that was authored:
You are assisting in building a professional design portfolio with a subtle 90s game-inspired interface.
A file called “MVP Roadmap.md” exists inside the /docs folder.
This file is the SINGLE SOURCE OF TRUTH for project status, decisions, information architecture, and build progress.

Your responsibilities:

1. Always read and reference `/docs/MVP Roadmap.md` before generating any output.
   - Treat it as persistent context.
   - Assume it contains the current vision, structure, IA, and completed work.

2. Anytime I say:
   - “We’ve locked this”
   - “This is final”
   - “Let’s update the roadmap”
   - “Consider this done”
   - “Record this”
   ...you MUST update the roadmap file accordingly.

3. When updating the roadmap:
   - Modify only the relevant sections.
   - Keep the structure clean and chronological.
   - Add a new section called “Changelog” at the bottom if needed.
   - Never remove important context unless explicitly told to.
   - Always maintain markdown formatting.

4. The roadmap must always reflect:
   - What is already built (pages/components/content).
   - What visual/styling decisions have been locked (colors, typography, themes).
   - What remains to be done.
   - Which phase we are currently working on (v1.0 shell, v1.1 visuals, etc.).

5. When generating UI, page variations, copy, or prompts:
   - Align with all details currently in the roadmap.
   - Do NOT contradict locked decisions inside the document.

6. If the roadmap becomes outdated or inconsistent:
   - Proactively notify me.
   - Suggest updates for accuracy.

7. All new instructions, locked decisions, and design choices should automatically flow back into `/docs/MVP Roadmap.md`.

In short:
- Use the roadmap as context.
- Keep it updated.
- Treat it like a living project document.
- Ensure all future outputs are consistent with it.
This is a crazy detailed prompt that did a lot to help Google Studio understand what it’s responsibilities as far as the updating and following the “roadmap” was concerned.
The exact purpose the roadmap served
It acted as a:
Single source of truth - IA, theme, decisions, progress.
Contract - If something was marked “locked,” the AI couldn’t revert or drift.
Guardrail - Even when I wiped a context window, the roadmap had the AI in the correct direction. I could fork different versions and still maintain context.
Chronicle - Doubled as a project log as I moved page by page.
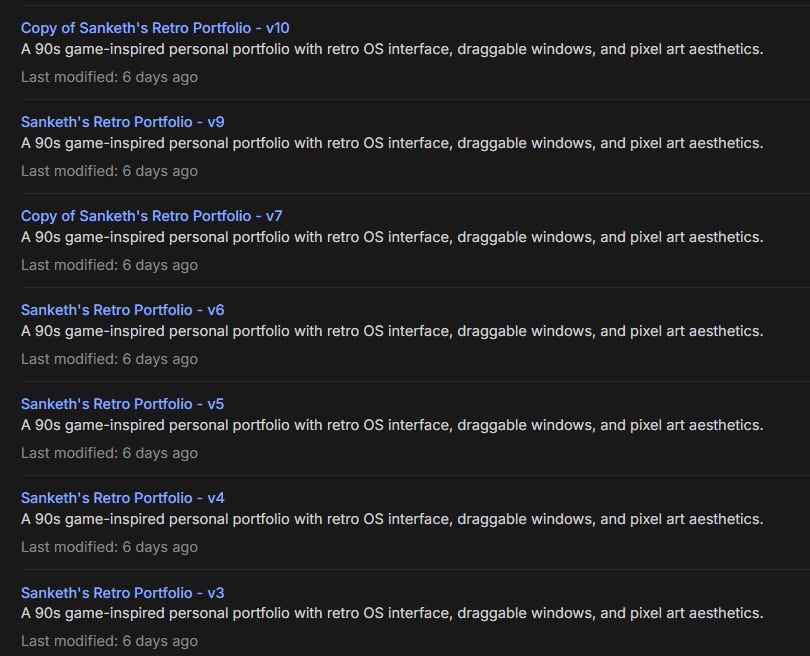
Forking Projects
Every major stage became a save point:
Initial layout working
Breakpoints stable
Theme switching functional
Because you’re experimenting continuously. And sometimes trying to execute an idea leads the entire project into a ditch.
Forking gave me psychological safety.
The Canvas Editor: Annotation > Prompting
The canvas editor in Google AI Studio is great!
You can literally:
write/draw on the canvas
draw arrows/rectangles
add comments
add text
and push/add them to chat.
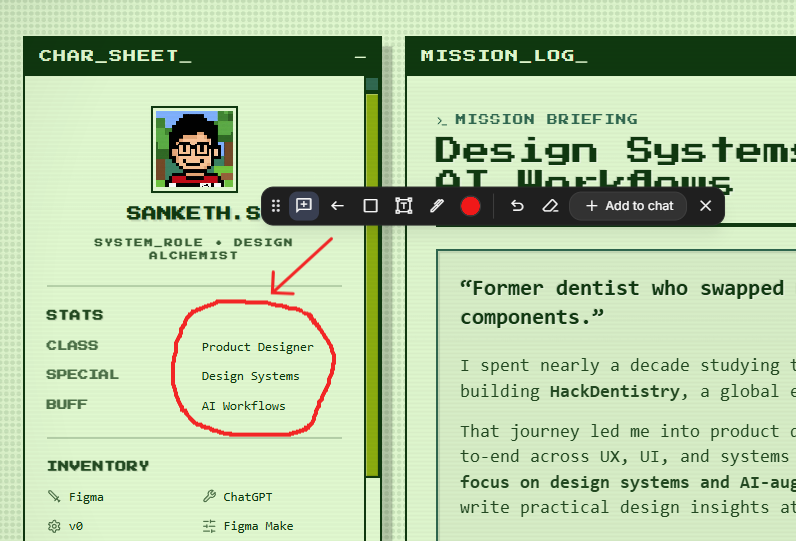
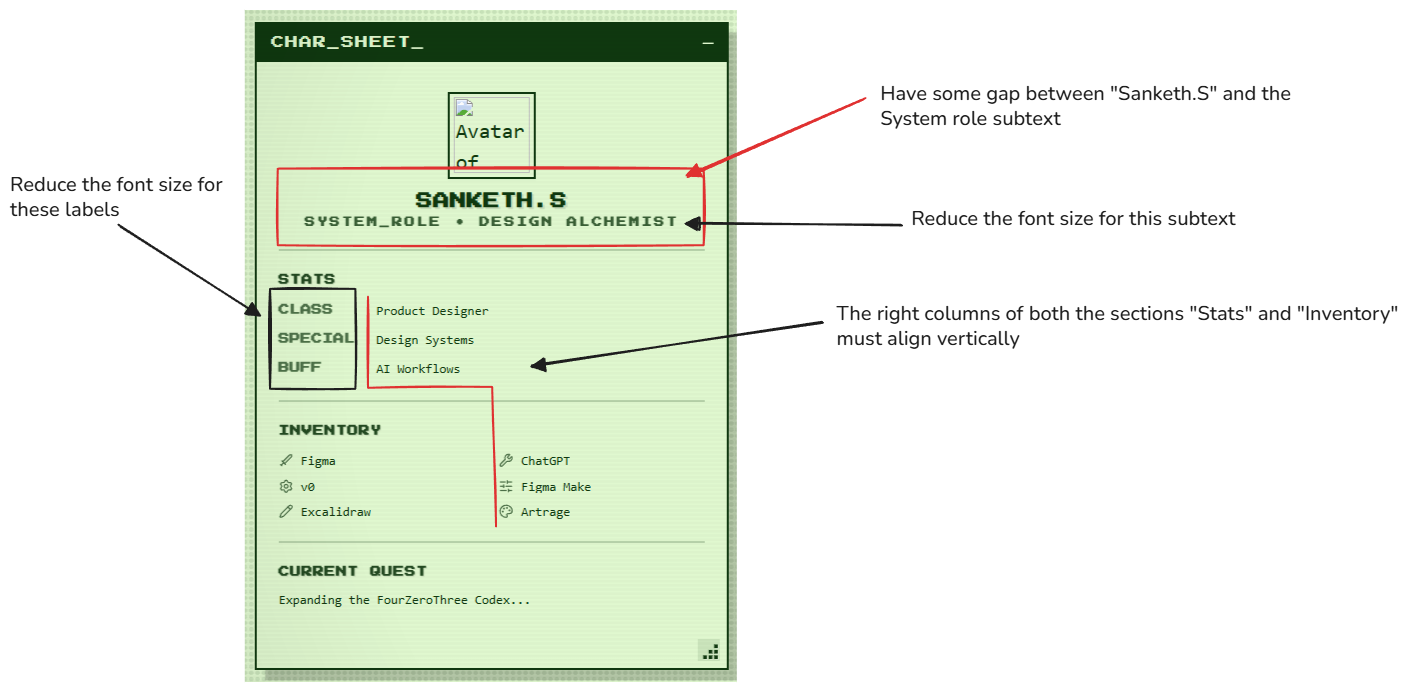
Using Excalidraw to create annotated images
When making changes inside of Google Studio, I used excalidraw to create annotated images to inform Google better. Surprisingly, this worked really well.
Wrestling With Breakpoints
I generated breakpoint-specific prompts (with GPT) with strict constraints and pasted them into Studio. Then I verified everything manually.
It wasn’t glamorous. I did a lot of testing and iterated several times.
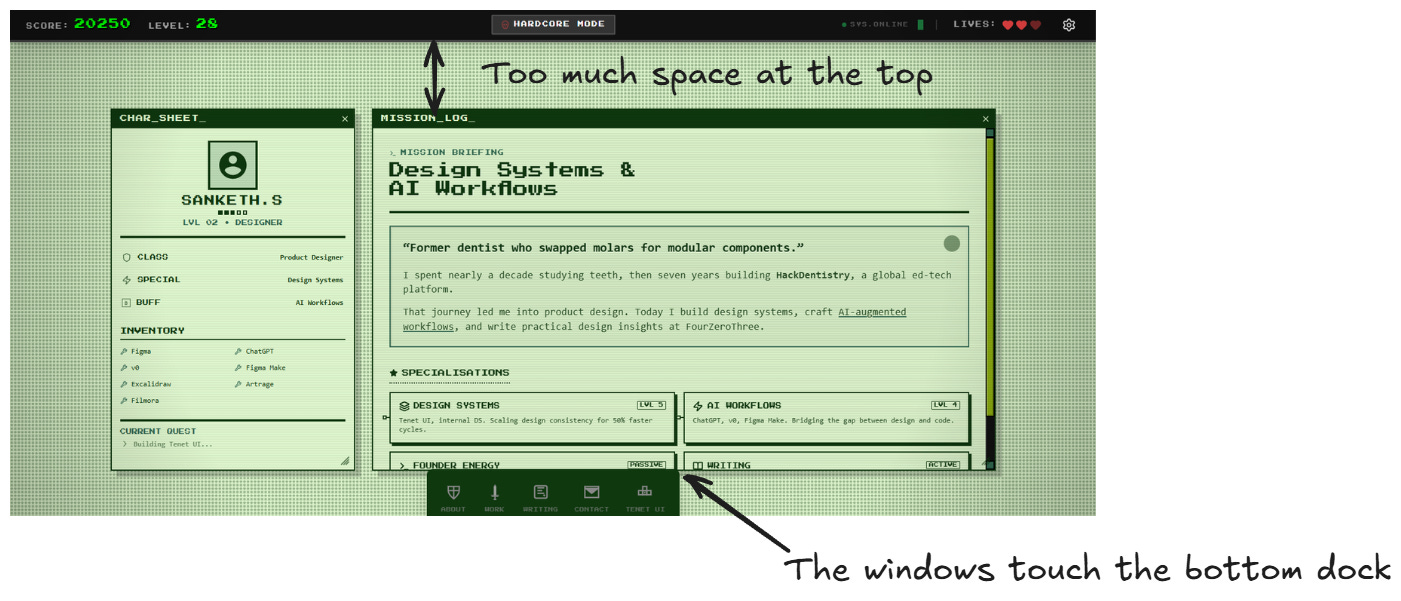
What this produced
By the end of this, I had:
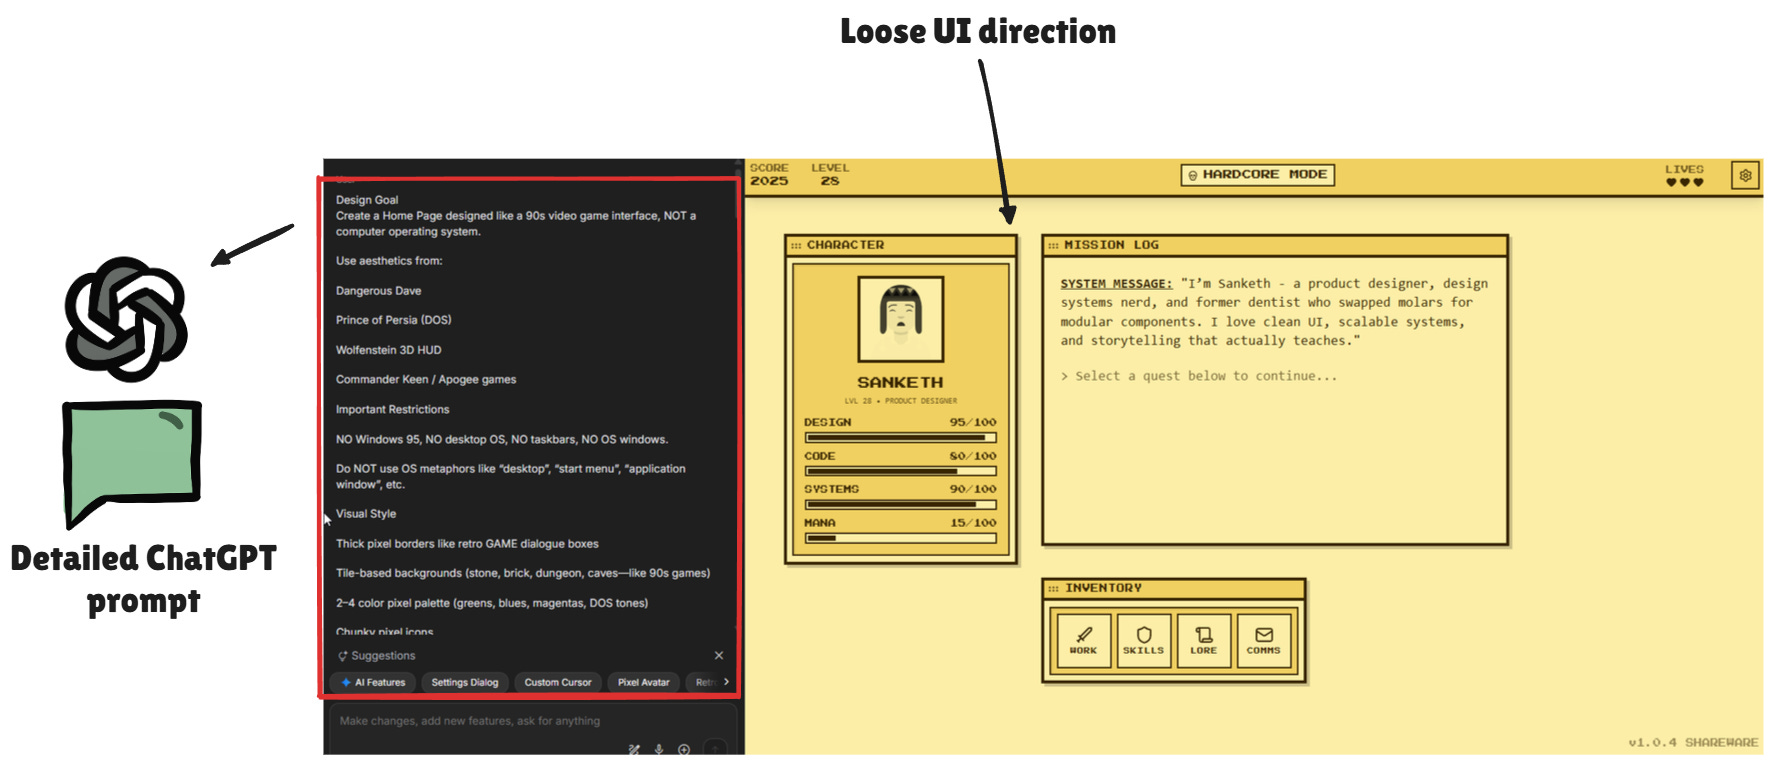
A 90s-style portfolio shell with draggable “windows” and a character sheet.
A stable layout across desktop + mobile (after lots of breakpoint wrestling).
A working deployment at portfolio.fourzerothree.in that now replaces my “newsletter as a portfolio” setup.
Closing Thoughts
By the time I had the shell, the instruction sets, the roadmap, and the workflow in place, the rest of the build honestly doesn’t need a dramatic story.
The point I want to make here is about the system I had in place to build this the scaffolding, the workflow, the thinking behind vibe-coding something real.
I think this is part of the building that nobody talks about. People assume the hard part is the prompting. It’s not. The hard part is creating the structure that keeps the prompts moving in the right direction.
So that’s where I’ll leave this piece.